Dongle Setup
Congratulations for your purchase of a GoodIP Dongle! Setting up a dongle is very easy and should take less than one minute.
1. Give power to the Dongle
Plug the dongle in a power source. You can use a USB power outlet. You can also plug the dongle in the back of a router - routers usually have USB ports in the rear. During setup, it can be convenient to simply plug the dongle in your laptop.
 OR
OR 
The USB connector only provides power to the dongle. There is no data transiting on the USB port, just power. This is why it can be plugged in a power outlet via a standard USB adapter.
2. Download the app
Download the GoodIP App at https://goodip.network/download/ (link opens in a new window).
3. Open the app
Open the GoodIP App, press "Setup Dongle" and then "Next":
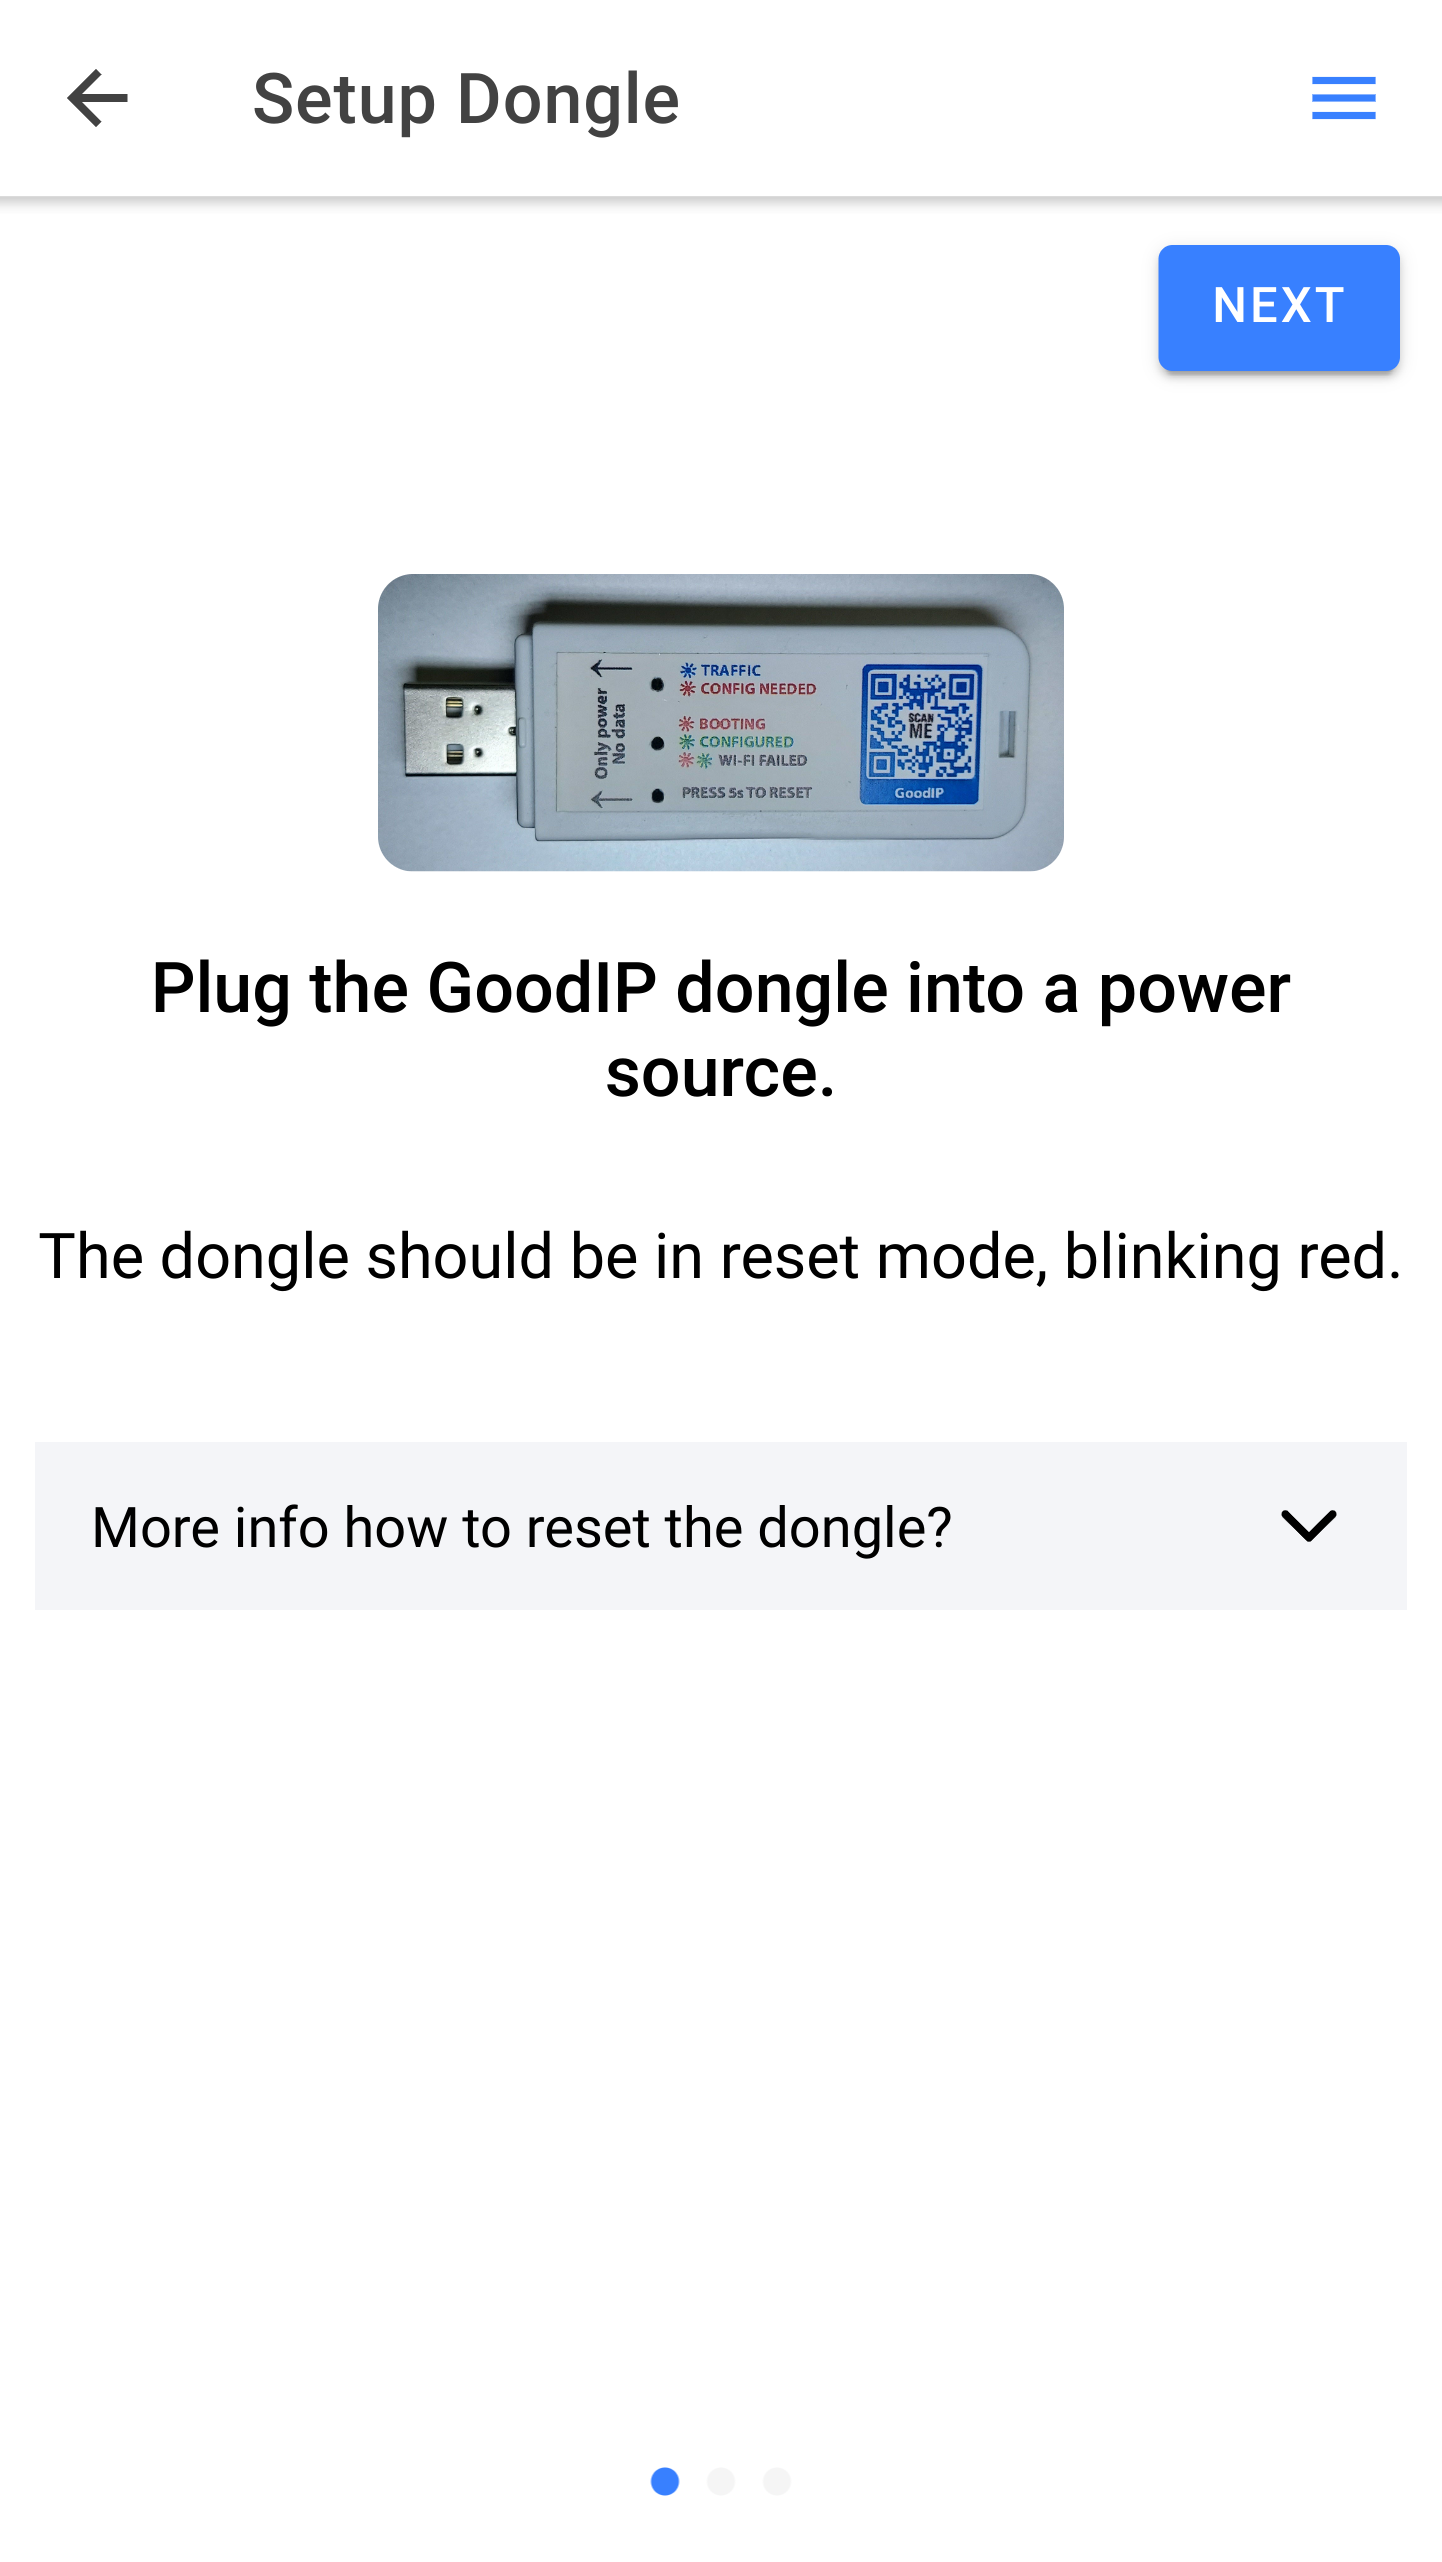
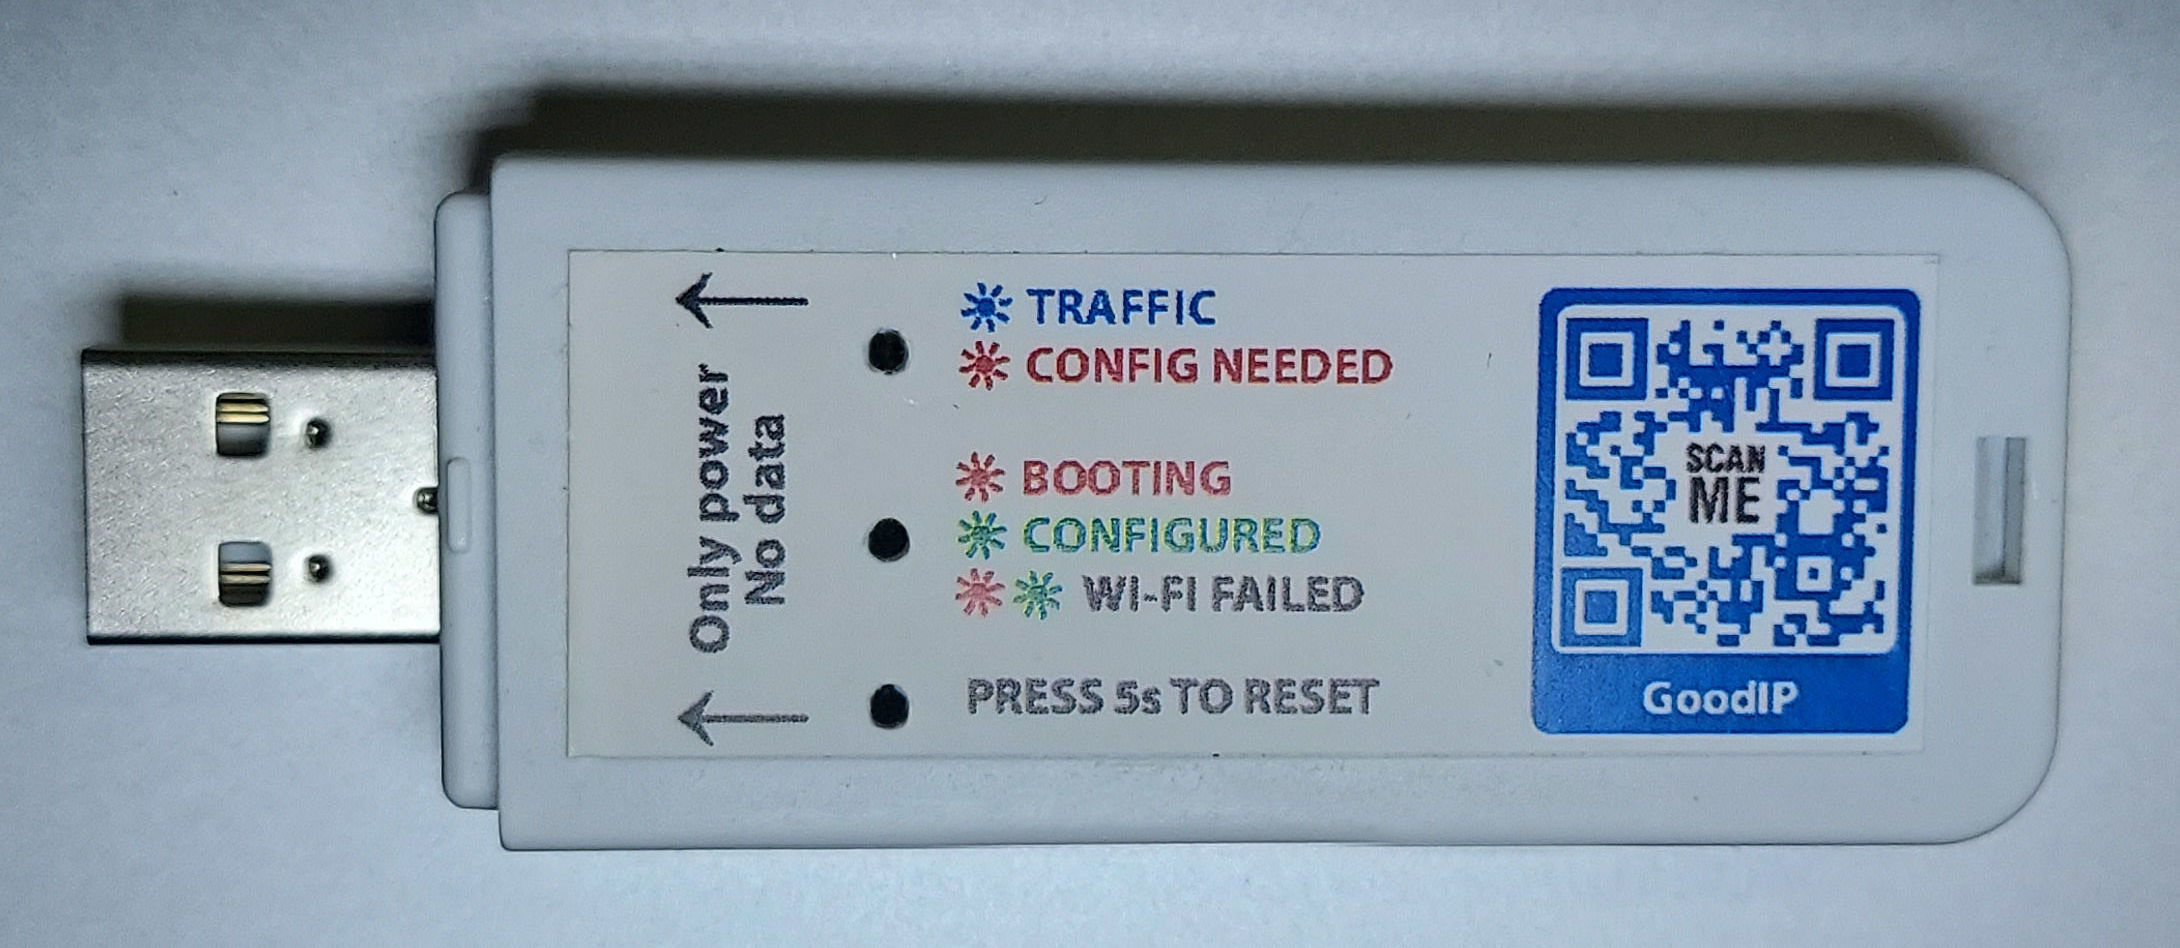
Pay attention to the blinking leds on the dongle. It will indicate the current status of the dongle. See the legend on top of the dongle to understand the status of the dongle.
In case you have already setup the dongle, you can reset it by pressing the internal button with a sharp tool for 5 seconds. A tooth pick was provided during purchase.
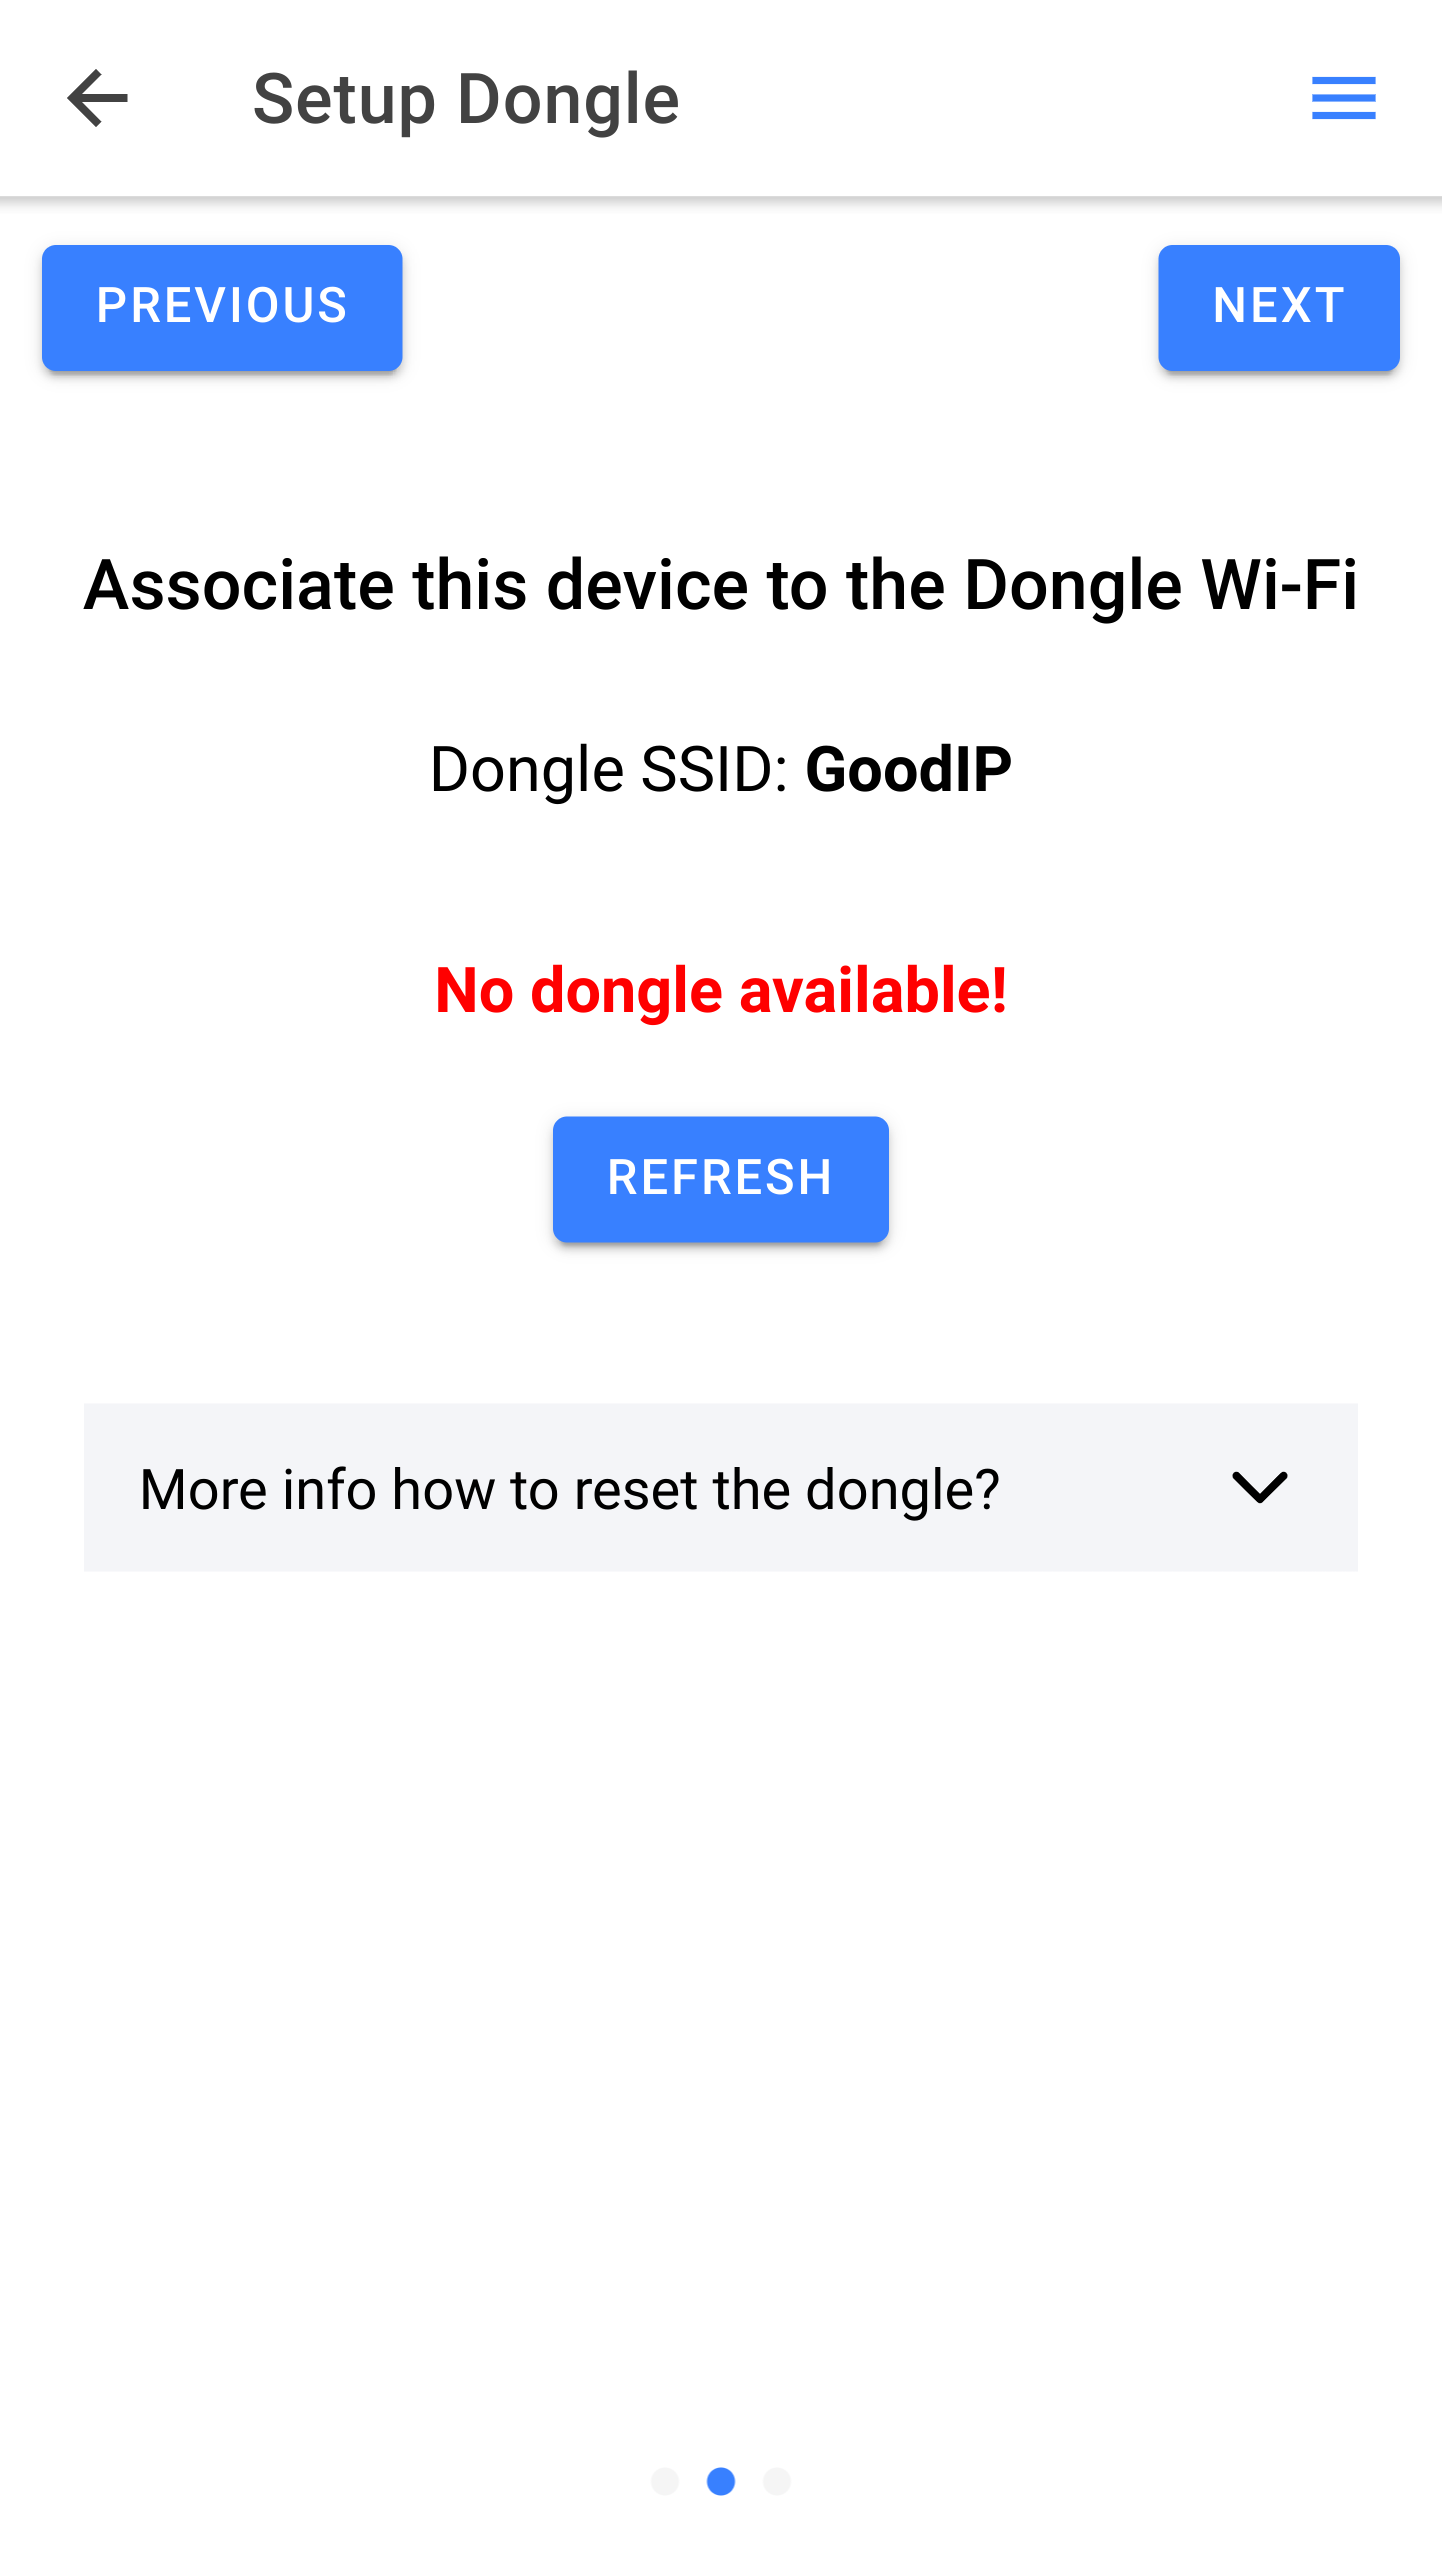
4. Associate to the Dongle Wi-Fi
Associate your phone or PC with the GoodIP Wi-Fi. The SSID is "GoodIP". Press "Next".

5. Enter credentials
Enter the SSID name and password where the GoodIP Dongle will operate and will be plugged.

The SSID name and password are not necessarily the current Wi-Fi you are connected to. If you intend to have the GoodIP abroad, you need to enter the name and password of the Wi-Fi where the GoodIP will be plugged.
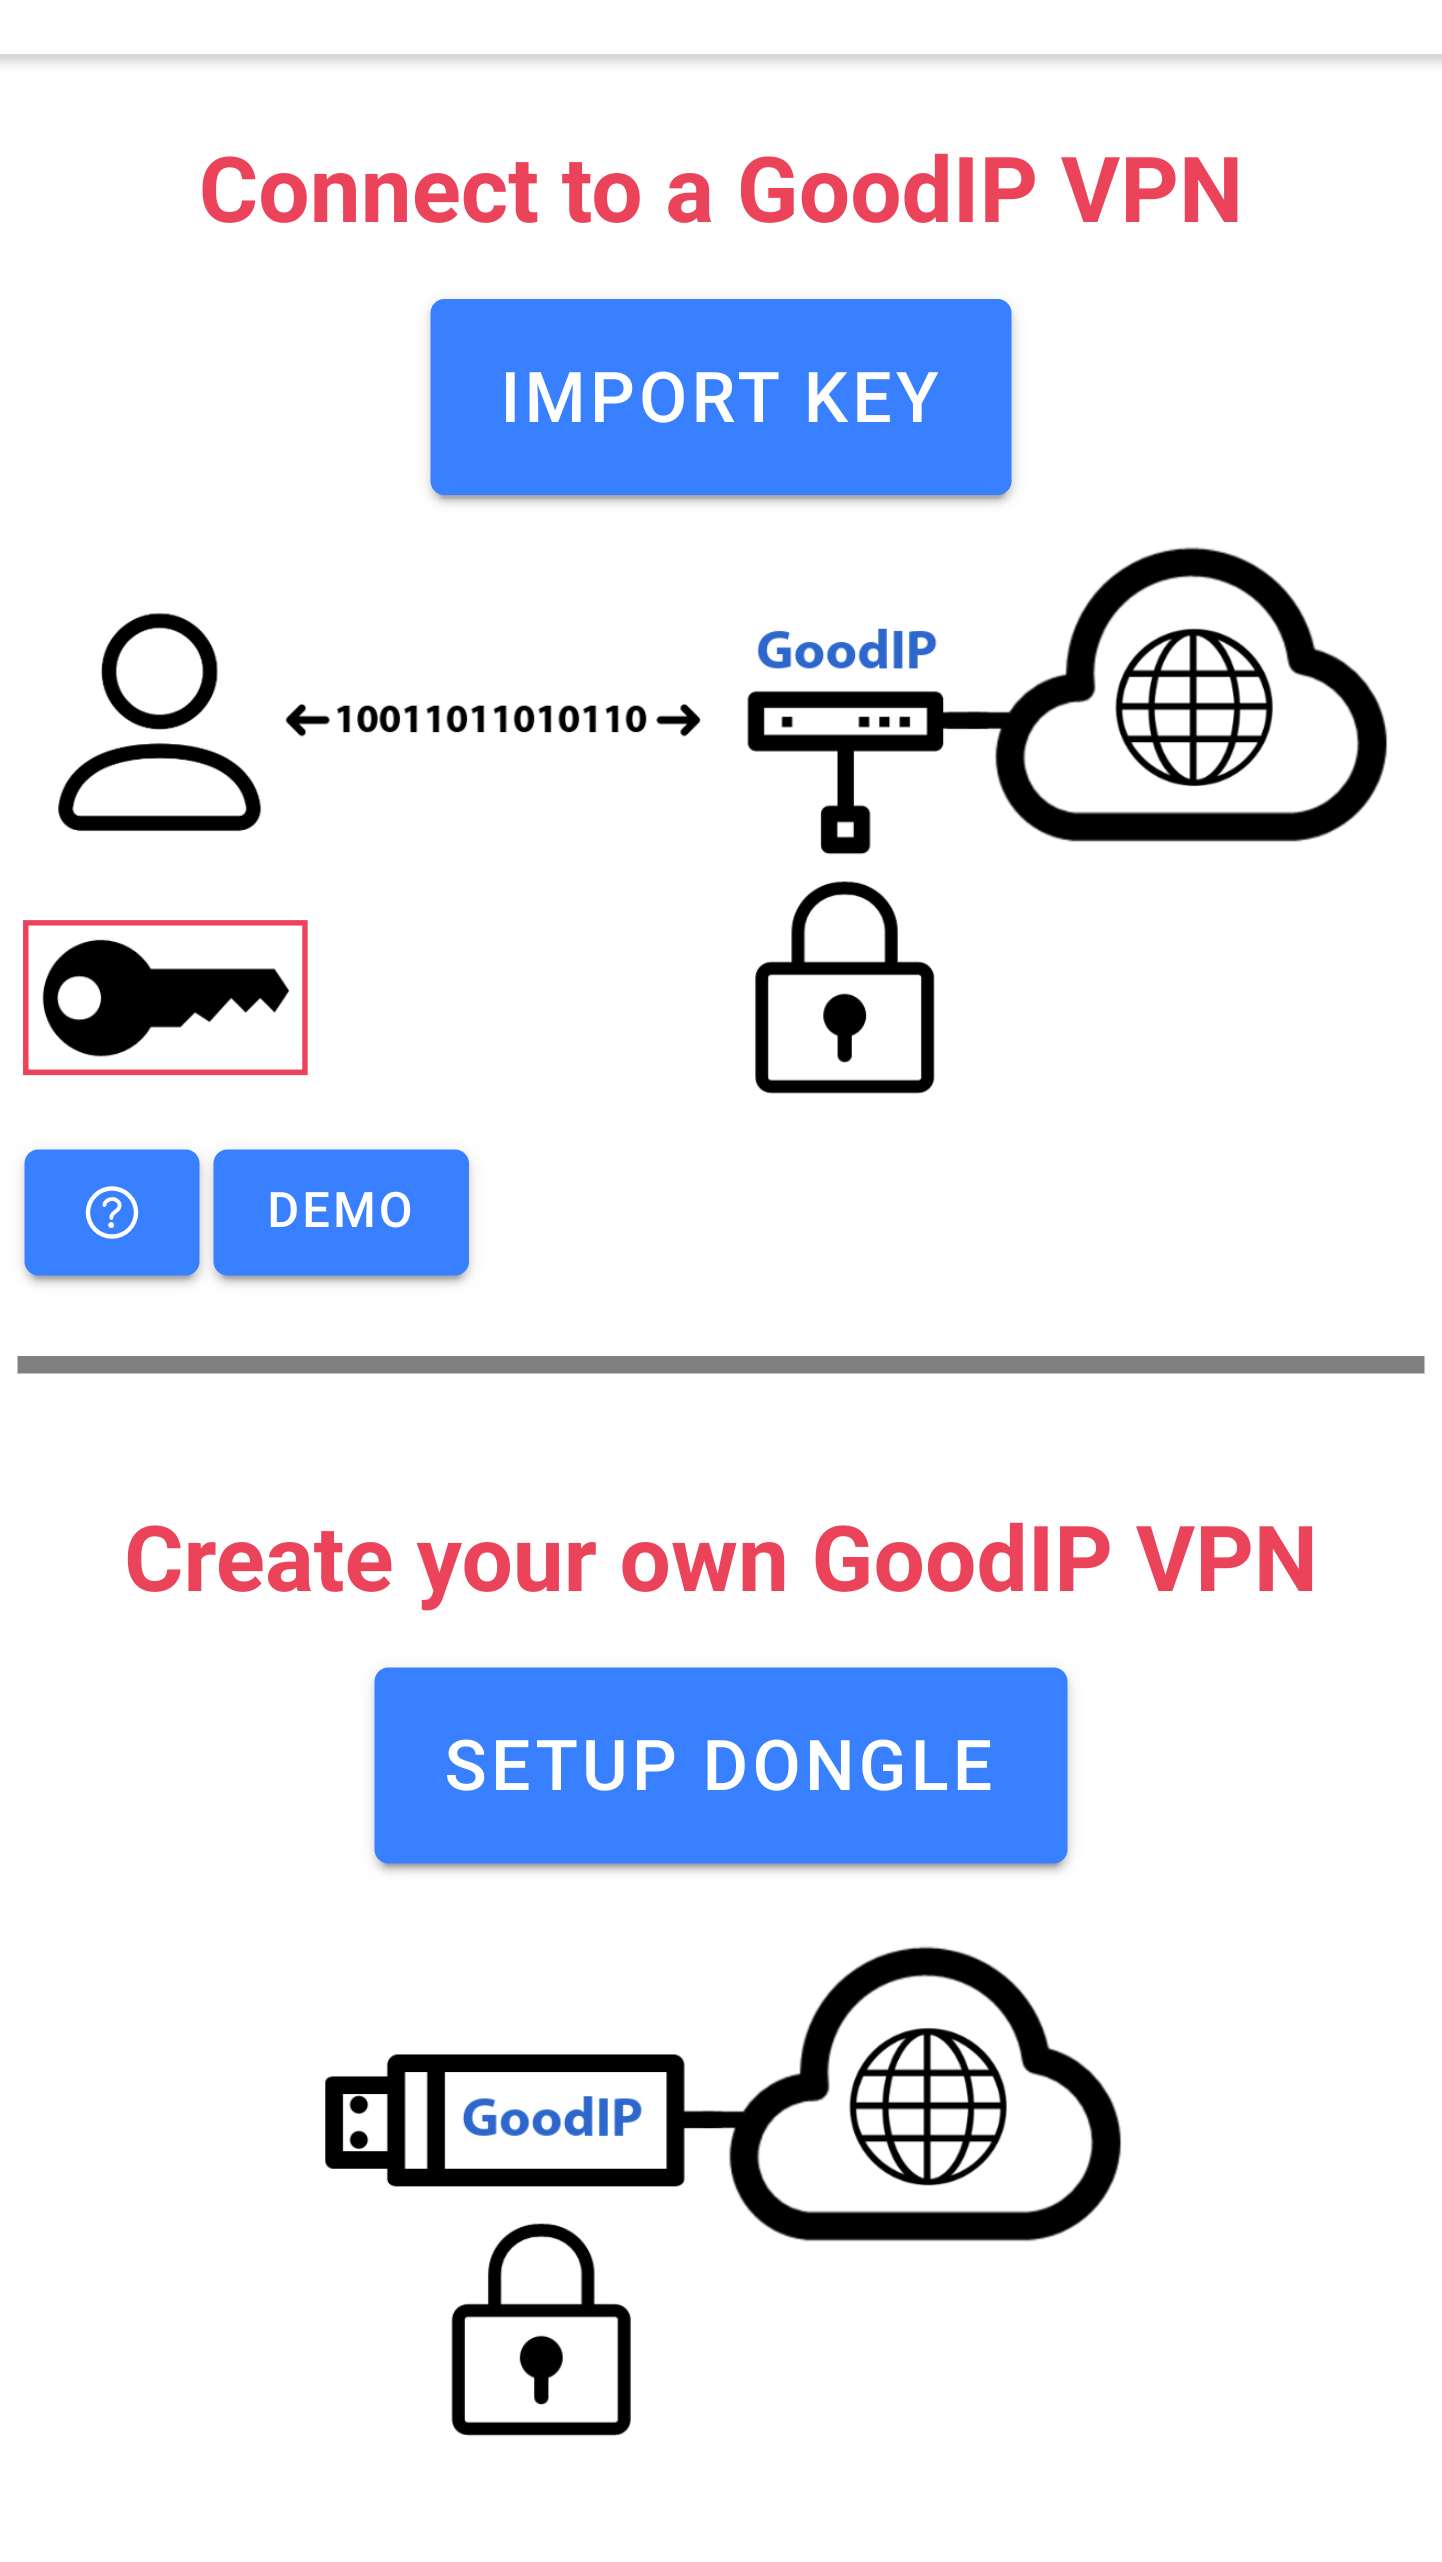
6. Use the Dongle
Once a dongle has been properly setup, it's accessible from the GoodIP App. When the setup is finished, the private key is automatically added in the GoodIP App. Follow those detailed steps to connect.